
Wondering how to get started with making miniatures? Look no further than this comprehensive guide to what tools you’ll need, and why you’ll need them.
This post contains affiliate links and as an Amazon Affiliate I may earn a small commission when you click on the links and make a purchase at no additional cost to you. You can read my full disclaimer here.
I’ve recently fallen in love with a new hobby: making miniatures! I ordered a miniature kit to get started, but was still a little overwhelmed with where to begin as it didn’t have every tool I would need. I quickly found myself asking: What tools did I need? What if I wanted to make different or additional items on my own? What glue works for different materials?
I’m breaking down the basic items you need to be successful with making miniatures, whether you’re using a kit or starting from scratch with your own materials.
Use these links to jump to a specific section, or keep scrolling to dive right in to my recommended tools for all beginners.
- Must-have tools for beginners
- Optional, but nice to have tools for making miniatures
- Other helpful glues for making miniatures
- FAQ
Must-have tools for beginners
Quick list:
- Nail scissors
- A small ruler
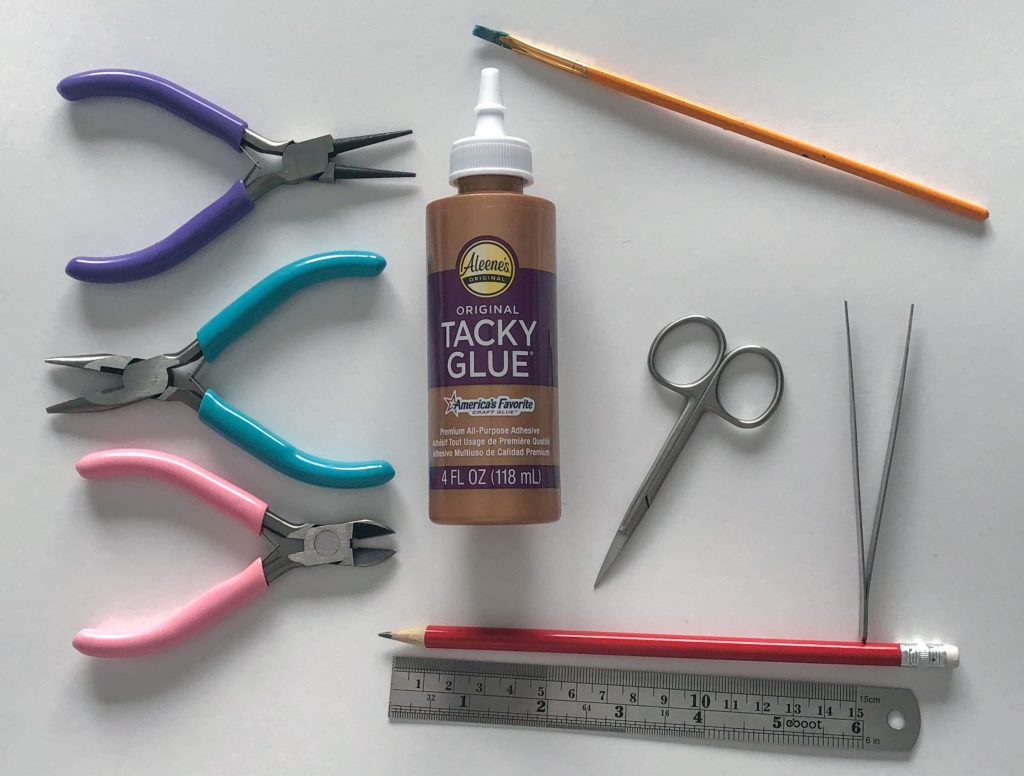
- Jewelry making pliers
- Glue
- A small paintbrush
- A pencil
- Craft tweezers
What you need for making miniatures, and why
Nail scissors. While you can use any pair of scissors you have around the house, you’re likely going to be cutting very tiny paper items. Think: less than an inch in size. Some straight tip nail scissors will allow you to cut much more precisely than traditional sized craft scissors. If you buy anything on this list, start with these. The linked scissors are stainless steel, so they’ll hold up for years. Cost: ~$7.
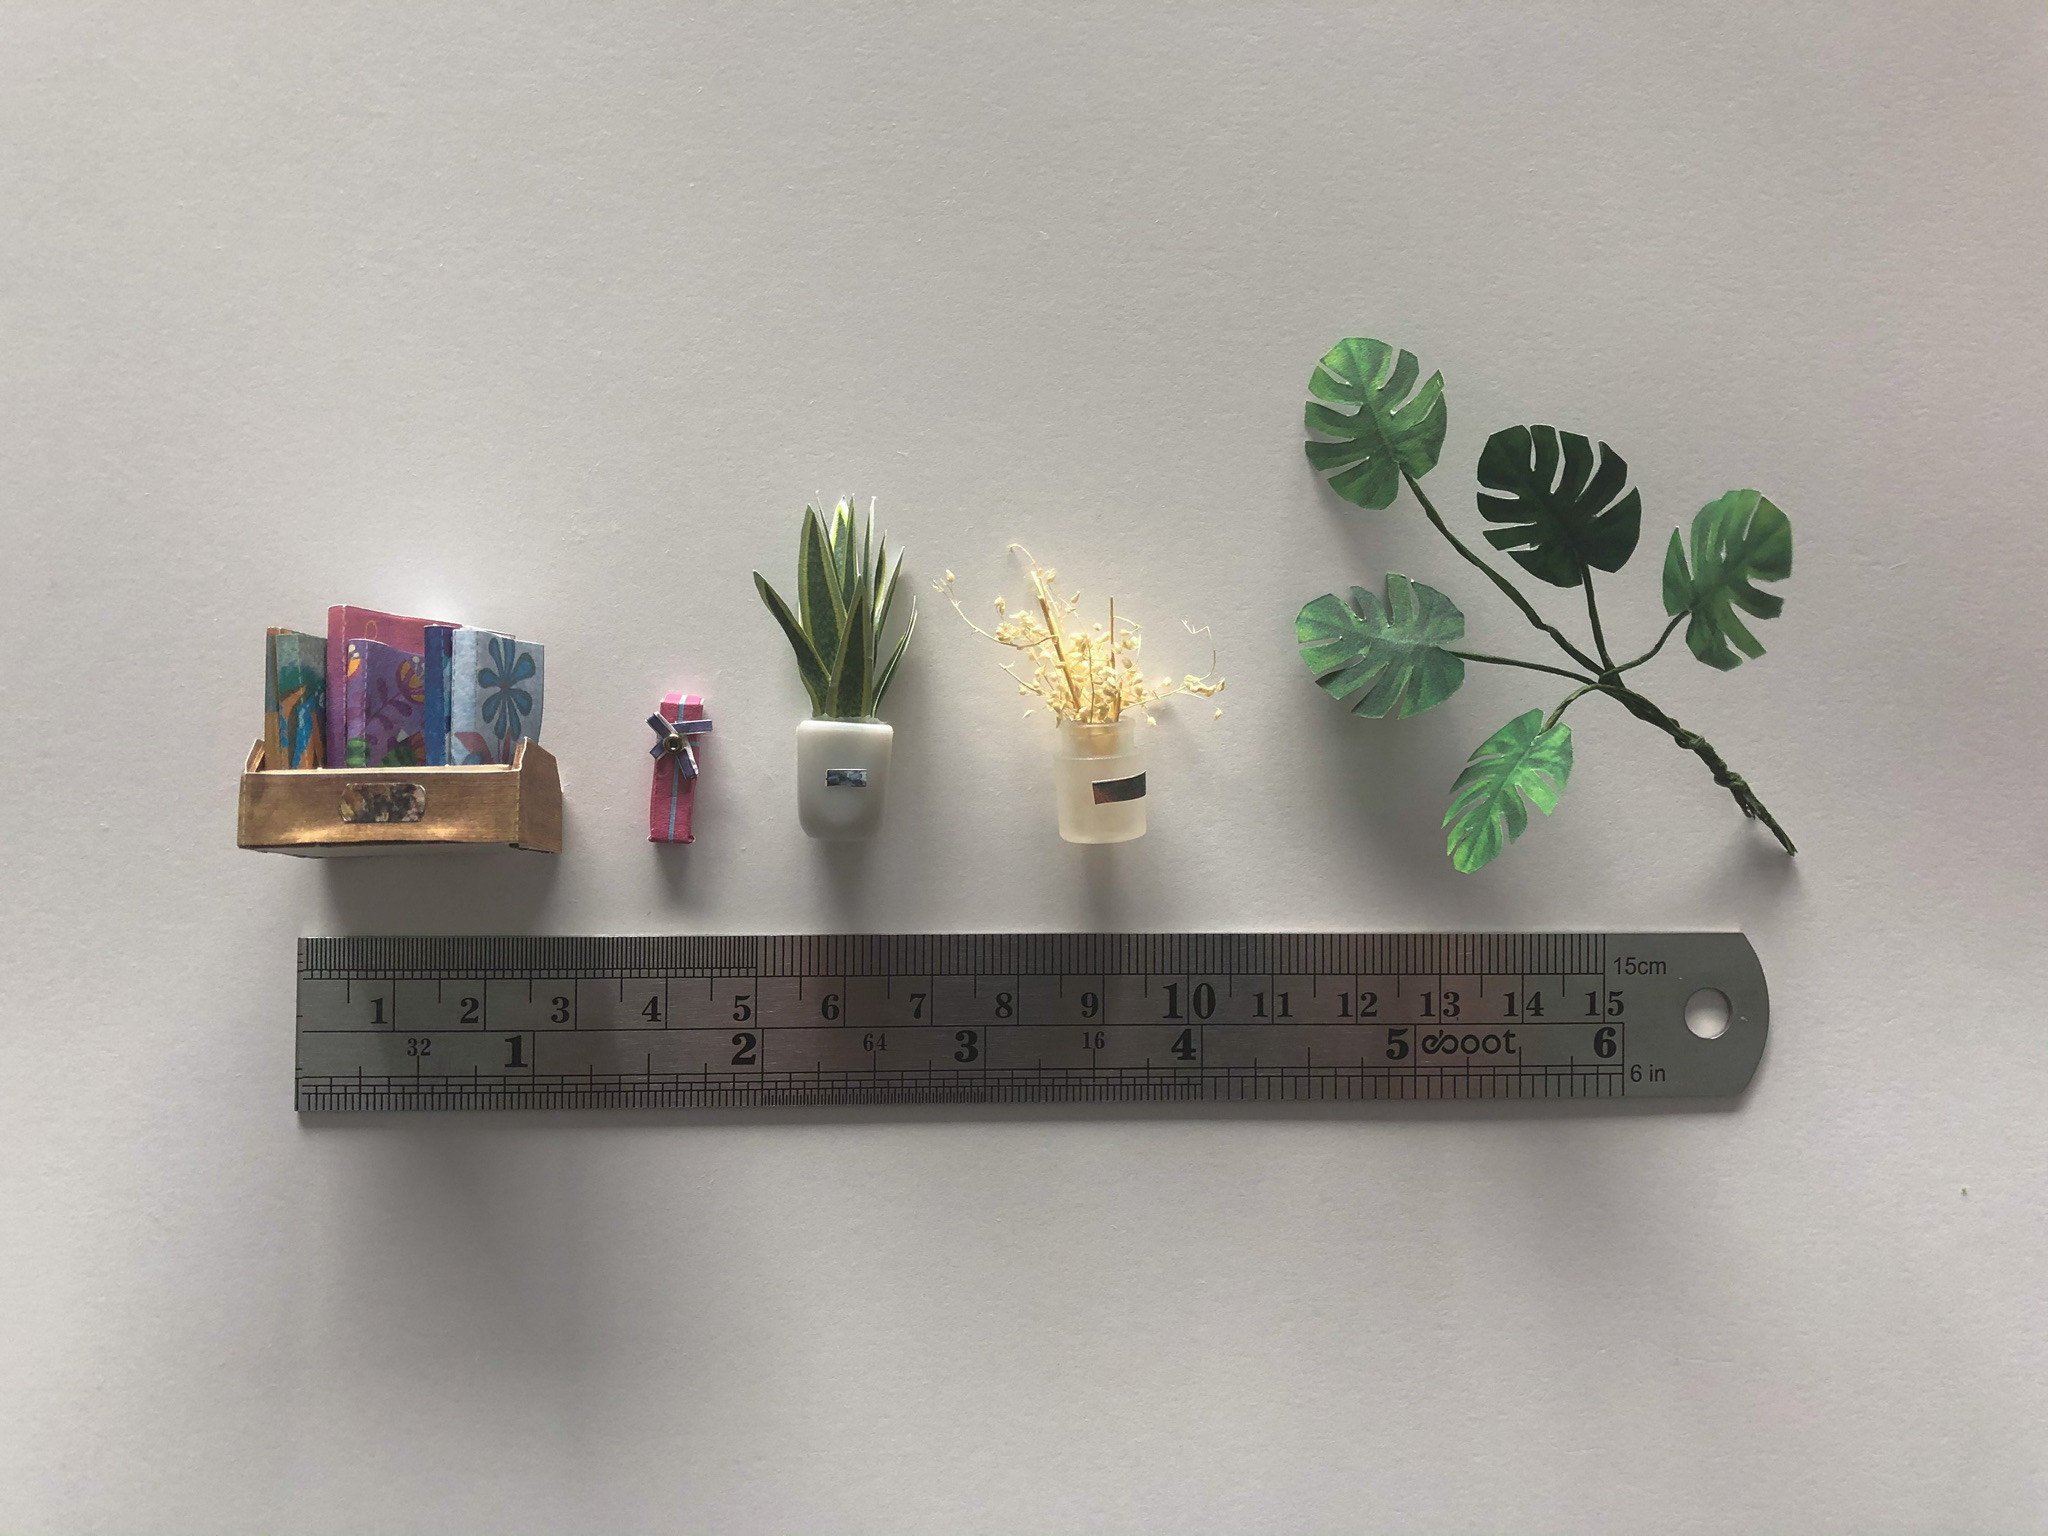
A small ruler. My kit asks me to measure specific lengths of wire for different plants I’m making. And if you’re creating from scratch, this is an obvious “must-have.” I’d recommend a stainless steel metal ruler that has both millimeter, centimeter, and inch markings so you can use it for many years and projects. I use this ruler set (the small one most often, but the larger size is needed for the bones of houses and other things). Cost: ~$7.
Jewelry making pliers. Technically, I am referring to small needle nose pliers, a small wire cutter plier, and a small round nose plier, but it’s easiest to find them labeled as jewelry tools. This is the kit I use that I would recommend as well – they fit nicely in your hand and work for all things miniature. Cost: ~$11.
Glue. There are lots of opinions out there about what glues are best for which items. If you buy a kit, it may come with glue, but I was a little skeptical of using a random glue I didn’t know the toxicity of. I quickly started using an all-purpose craft glue for most items in my kit, and it’s been working great for paper and cardboard projects. I recommend what I’m using, Aleene’s tacky glue, since it dries clear and fairly quickly. Cost: ~2.
A small paintbrush or two. I use one to help apply glue to paper and cardboard projects. They’re also handy for, you know, paint, but you’ll want a separate brush for glue and paint. I like the variety in this set. Cost: Free (if you have on hand) to ~$7 for a mixed pack.
A pencil. Handy for marking off items you complete in the instruction book if you’re doing a kit. Also much needed for tracing before cutting with total DIY projects. I’m assuming you have one laying around the house some where, so cost: Free.
Craft tweezers. If you’re starting with a kit, it will most likely come with these. If not, you’ll want to invest in a pair to help you hold things steady for gluing, place objects into rooms and scenes, and more. Cost: Free to ~$4.
Optional, but nice to have tools for making miniatures
Quick list:
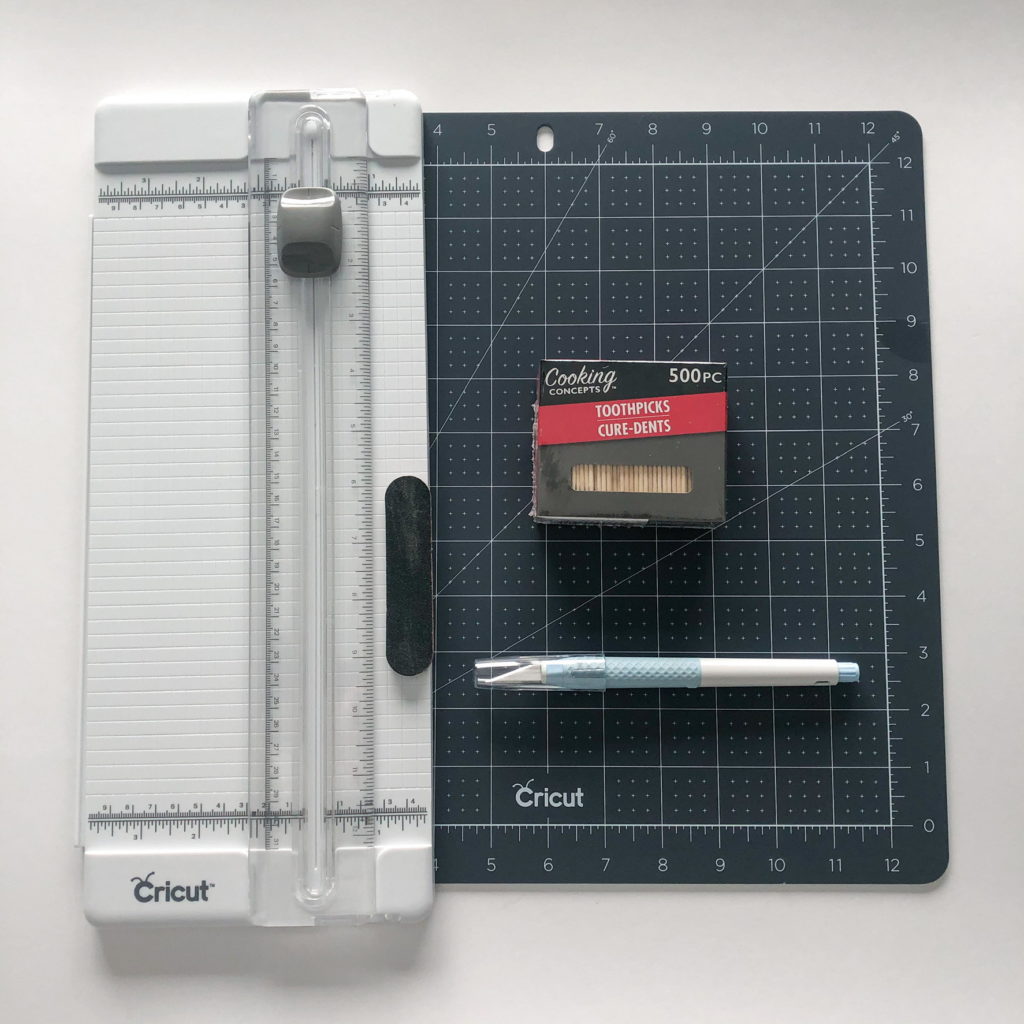
- A craft knife
- A self-healing cutting mat
- A paper cutter
- A nail file or sandpaper brick
- Toothpicks
More details on optional tools
A craft knife. Also known as an Exacto knife, these can be a great tool for cutting paper and fabric. But I’ve found there’s a big learning curve for cutting precisely (and safely). I prefer this one from Cricut even though it’s not the cheapest, due to the grip and safer blade changing feature. Cost: $15 for my recommendation, can be found cheaper.
Self-healing cutting mat. These protect your work surface and allow for easy cutting if you’re using a craft knife. I have two of these, one that stays on my desk always, and one that I can move to different workspaces. Cost: Varies widely depending on size, but budget for $15-30.
Paper cutter. These are super handy for cutting large paper items you need straight lines for. Especially if you don’t see or cut straight (which is my problem). If you’re a big crafter, chances are you already have one. If not, there’s many options. I have a Cricut one I love, but this is a little cheaper. Cost: $10+.
Nail file or sandpaper brick. These are really only needed if you’re going to be working with any type of wood. I’ve found I needed a file for several items in my porch kit project so far. Sandpaper would be far handier (and quicker) than a nail file, but a nail file does the trick if that’s what you have on hand. Cost: Free to $7.
Toothpicks. They’re not just an awesome and cheap material for making miniatures. Toothpicks can also be used to apply glue where you need an even finer point than a paintbrush. Or to paint details on painted items. Or in clay items. The sky’s the limit! Cost: Free if they’re in your cabinet, otherwise get them at the $1 store or your grocery store for much cheaper than online options.
What other glues might I need for making miniatures?

There are, surprisingly, hundreds of glues out there for very different uses. I’m breaking down some glues that may be helpful for different materials below.
Metal glue. Some metal pieces in my kit have just not wanted to stick with regular craft glue. I grabbed a small tube of jewelry & metal glue to use instead, and it’s worked a lot better. Cost: ~$3.
Zig chisel tip glue pen. This is the primary glue I use for gluing small paper pieces to other paper pieces. It’s thinner than craft glue and allows you to be a bit more precise. It also still dries clear and gives you a small window of time to adjust the two pieces if you don’t lay them exactly right. It’s cheaper at craft stores like Michaels, but if you’re in a quick pinch, you can buy it on Amazon. Cost: ~$3-6.
Wood glue. Craft glue does work on wood, but it doesn’t dry as quickly as I have found I need it to when putting together things like furniture. I’ve switched to wood glue and prefer it especially for structural things. If you’re going to be working with any kind of wood regularly, it’s worth grabbing. Cost: ~$2-3.
Hot glue – but use sparingly. I used hot glue for a couple things in my miniature kit that I didn’t have any other kind of glue for yet. And it worked, in a pinch. It’s handy for cardboard where people won’t see the seams or for when you need a super quick dry. But it doesn’t dry as thin as most other glues, which can lead to bulky seams or gaps. And, it’s technically not waterproof or permanent (it’s very easy to pull off and apart) so it may not work for all projects. Cost: ~$10-15 for a glue gun with a few sticks, if you don’t already own one.
Crafter’s tape. Crafter’s tape works like a thin strip of glue, but you roll it on. It can be handy for some flat paper products. But a word of caution: you get one shot with this stuff, and one shot only. If you don’t lay it exactly right the first time, you’re f$@*ed, because your paper won’t come apart without ripping. Cost: ~$7.
Miniature making beginner questions, answered
I had a lot of questions when I first started making miniatures and a hard time finding definitive answers without a lot of hunting around. Below, I’m answering a few for you to help you get started.
Do I really need all these tools to get started making miniatures as a beginner?
If you don’t want to be frustrated while you work with all the tiny materials, probably. Can you get by with just a basic pair of scissors and glue? Technically, yes. But you won’t get as precise edges, may have bumps and lumps or wrinkles in what you’re gluing, etc. At a minimum, I recommend you invest in a pair of nail scissors, a small ruler, a good craft glue, and a pair of craft tweezers for all beginners jumping into the world of miniature.
What glues can I use on cardboard?
Cardboard is one of the most recommended materials for making miniatures because it’s super versatile. Many glues are compatible with cardboard, but some will cause it to warp if the glue is too wet or you use too much. I recommend a basic tacky glue like Aleene’s all-purpose tacky glue for cardboard projects – and my pro tip is to use a small paintbrush to brush it on thinly and evenly.
It does take some time to dry which can be challenging for basic structural items made of cardboard. In a pinch, you can use hot glue for these places, especially if they will be hidden. But use it sparingly because it dries pretty thick so you may not get an even seam.
For gluing paper onto cardboard, consider a chisel-tip glue pen that goes on thinly and lets you move what you’re applying around a bit before it’s “stuck.”
How do I get started with making miniatures? There’s so many options!
The miniature making hobby can be overwhelming. Especially if you’ve already fallen down the rabbit hole of DIY Youtube videos or found a social media group where people are sharing their very expert-looking creations. But it’s easier than you think to get started, and my advice: just pick something and start!
You don’t have to build a full on house from scratch. Start small by making a room out of a cardboard box. You can make miscellaneous mini items like books or plants or whatever strikes your fancy. Or, you can start with a full on miniature DIY kit. A kit is what I’d recommend for the full experience! But there’s no right or wrong way to go about making miniatures.
Thought your lists and tips were very helpful and honest.
Thank you! Happy miniature-making if you decide to get started!
I’ve always been super fascinated by miniatures, and decided to give it a try as part of a skill-building challenge. I picked up the tools you recommended, and a small room kit from Michael’s (wish me luck)…but I was just curious if there are any specific creators, or YouTube channels you would recommend for a beginner looking for some technique fundamentals.
No one specific comes to mind, but I usually just look up the type of mini I’m interested in making (rooms, specific objects, etc) and poke through the videos that look the most interesting!
This is an amazing list, thank you. I do have a question though: what do you use for wood? I was thinking either a dremel with a ‘saw’ blade, or a very fine saw?
So glad it was helpful! I don’t do much with wood that isn’t pre-cut in a kit already. But it seems like a lot of people use “hobby saws” or smaller hand saws, and I imagine a dremel with a small saw blade would work too depending on the thickness of the wood! A very sharp exacto knife can also do thin wood like balsa sometimes – but probably less precise cuts depending on how much pressure you are able to use.